
Final DCP offers an editor to change color and picture settings. You can choose from standard presets for cinema and tv material or use your own custom settings. All changes can be saved to just one reel or to all reels in Final DCP.
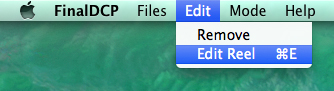
For editing the video file of a reel you need to choose the video subfolder in the reel you want to edit and navigate in the menu of FinalDCP to “Edit -> Edit Reel” to start the Reel Editor or by shortcut (win: “STRG + E”; mac: “cmd + E”):
1. Reel Editor
Within the Reel Editor you can adjust the picture settings while having a live preview of your footage and getting information about the scopes (Histogram and Waveform).
The Reel Editor is separated into areas for scope information, picture settings and the video signal (original and converted).
2. Preview Settings
Within the Preview Settings you can adjust how the picture is shown on your monitor. You can choose the Preview Colorspace, the Zoomfactor and turn on/off the Splitscreen Mode:
![]()
In most cases “sRGB” is the correct Preview Setting on computer monitors.
To zoom in or zoom out you can either type in the Zoom Factor value or use the scroll whell of your mouse while your cursor is over the picture area. By double clicking to the Zoom Factor the picture is automatically fitted to the window size.
By activating the Splitscreen Mode you can show the converted picture (depending on the Picture Settings you have chosen) next to the original picture. The picture is divided on its half but can also move the Splitscreen Border line left and right. Press and hold “0” to have a preview of the complete picture (the Splittscreen Border line flips back to center).
3. Scopes
To show or hide the Scope information bar (RGB-Histogram and Luma or RGB Waveform) on the left of the Reel Editor window click the Scopes button:
3.1. RGB-Histogramm
The RGB-Histogramm shows the intensity of red, green and blue (y-axis) for every row of the picture (x-axis). The top histogram shows your input signal and the button histogram shows the output signal:

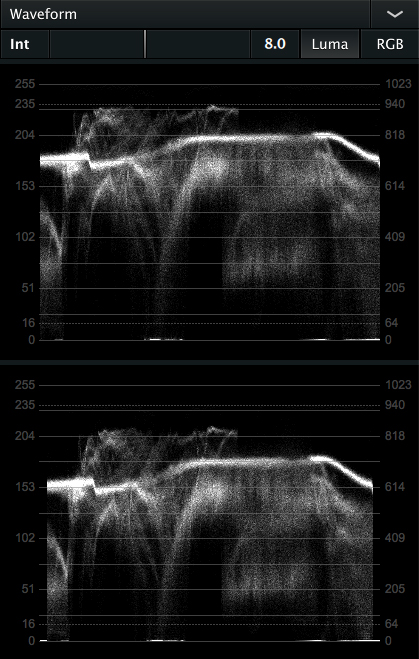
3.2. Waveform
The Waveform charts are showing brightness values of the image (Luma) or the RGB curves.
The left scale of the diagram are 8-bit values and the right scale are 10-bit values (y-axis). The minimum and maximum values per scale are shown by the dotted line.
The intensity (Int) value is a simple multiplier (minimum: 0.0; maximum: 16.0) and can be changed either by moving the slider or by typing in the value. Again the top diagram shows your input signal and the button diagram shows the output signal:
4. Picture Settings
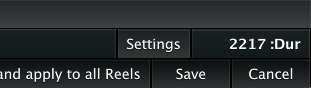
By clicking the Settings button you can show or hide the picture setting bar on the right of the Reel Editor window. Within these options you can adjust Color, Crop/Scale and JPEG2000 settings:
4.1. Color Settings
To adjust the color of your pictures you can choose from several presets we have prepared for most common applications:
| Preset | Setting | Brightness |
|---|---|---|
| Custom | Manual adjustments for white point and In / Out Black / White values | In: 0% – 100%
Out: 0% – 100% |
| Full range clipping | For cinema with maximum white point | In: 0% – 100%
Out: 0% – 100% |
| Full range safe | For cinema with safe white point | In: 0% – 100%
Out: 0% – 95% |
| Legal range clipping | For TV with maximum white point | In: 16 – 235
Out: 0% – 100% |
| Legal range safe | For TV with safe white point | In: 16 – 235
Out: 0% – 95% |
The presets are a good starting point to do the fine tuning of the input / output black and white values such as gamma, linear slope and linear limit afterwards. If your adjustments match one of the preset settings the preset automatically changes. Otherwise your setting will stay on “Custom”. You can either change each value with the sliders or by typing in the concrete values. By double clicking to one of the category name fields this value will switch back to its standard value:
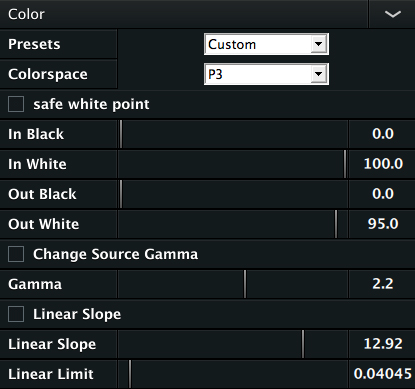
Within Colorspace you can choose the source colorspace from X’Y’Z, rec709, sRGB, AdobeRGB and P3.
Use the safe white point option to ensure proper transcoding to X’Y’Z due to the luminance dropout of about 5% and to compensate yellowish highlights.
4.2. Scaling Settings
Within the Scaling Settings you can scale and crop the video size. You can either use Auto Crop or scale manually by Enable Crop.
To move the video snippet adjust X / Y Offset or use Center Crop:
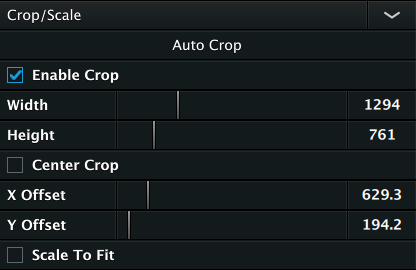
Use Scale To Fit to fit the video snippet to the chosen width.
4.3. JPEG2000 Settings
The JPEG2000 Settings allow you to adjust the compression rate of every single picture of your footage. You can adjust the among of compression in percent by moving the slider or by typing in the value:
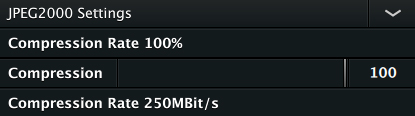
To change the compression rate navigate to “Preferences -> JPEG2000”.
5. Saving Settings
To save the adjustments to just the reel you have opened the Reel Editor with click the “Save” button.
You can also apply this adjustments to all reels of the active CPL by clicking “Save and apply to all”:
![]()